Monitoring JVMs
After jvmguard is installed, the agent can be added to JVMs that run on the local machine.
Basic mechanism
Section titled “Basic mechanism”The jvmguard agent is a Java agent. It is loaded into a VM by specifying the -javaagent JVM option. Java agents
are able to instrument classes as they are loaded and to retransform classes that have already been loaded.
To prepare a VM for monitoring, you need to know the actual JVM option that needs to be inserted into the start script
of your application server or your application. The jvmguard agent is already available in the jvmguard installation
directory, and the jvmguard UI shows you how to construct the correct -javaagent JVM option.
To get started, click on the “Add VMs” button in the header.
Adding a local VM
Section titled “Adding a local VM”Since the jvmguard agent is already available in the jvmguard installation directory, you can easily monitor a locally
running VM. The “Add VMs” dialog displays the complete -javaagent JVM option for the simplest case without any
further configuration. It is suitable for monitoring a single VM.
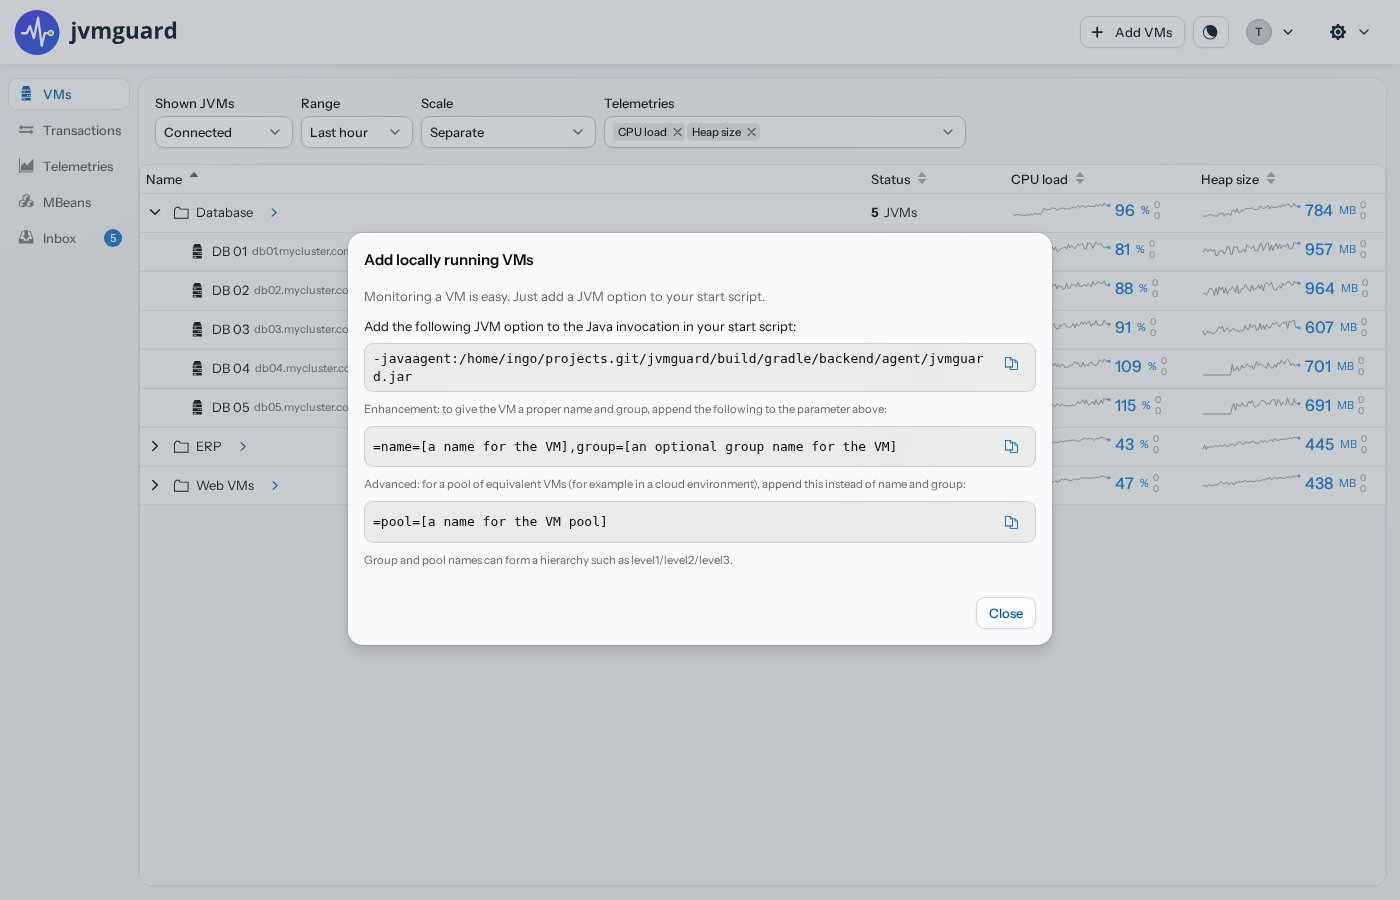
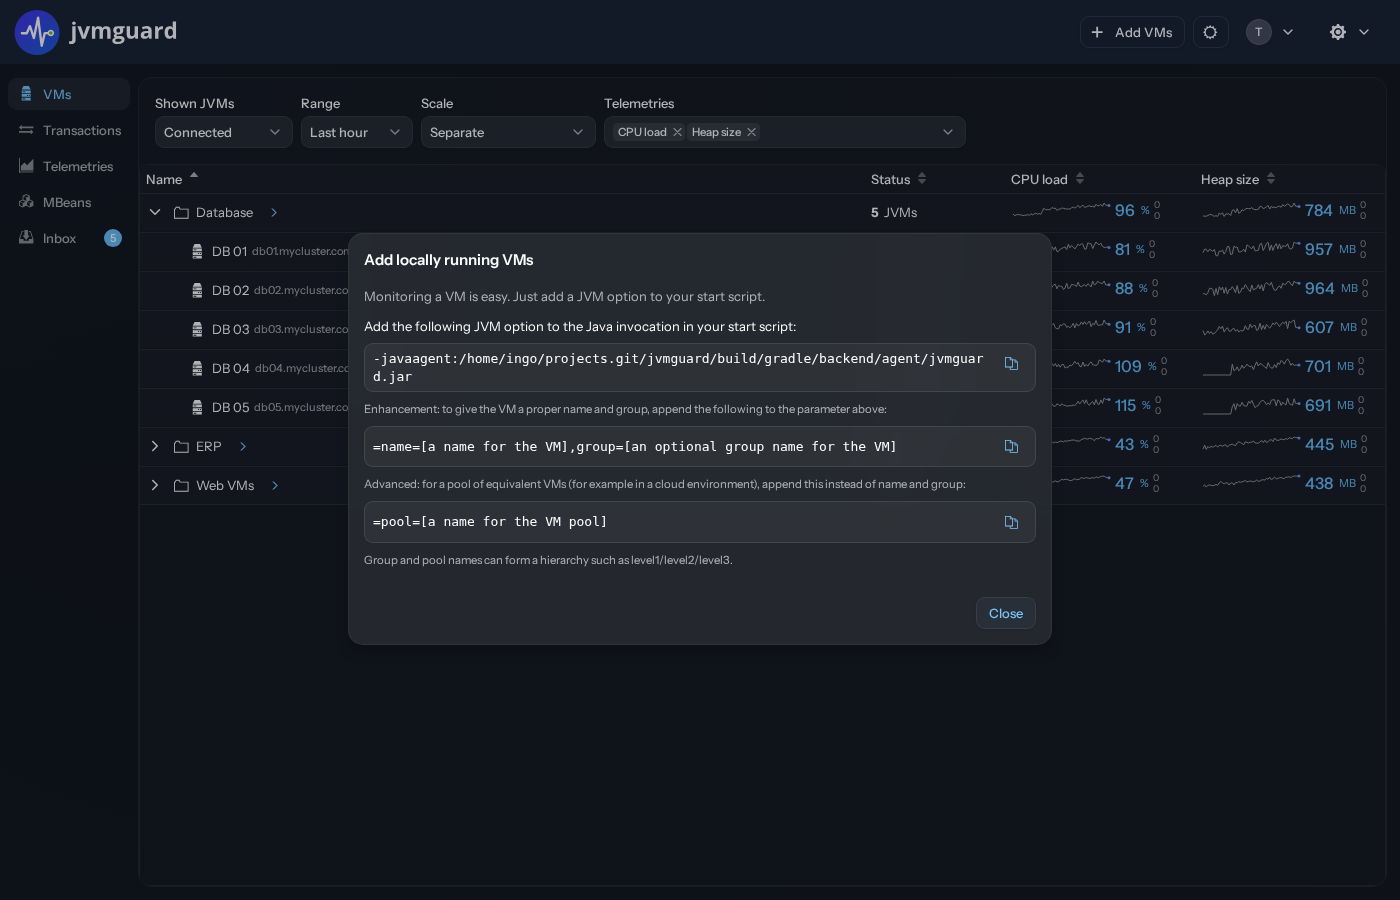
Without the “server” option, the agent will assume that the jvmguard server is running on localhost. Further instructions regarding group and pool names are explained below.
Naming VMs
Section titled “Naming VMs”If you monitor multiple VMs, you have to give them names to be able to identify them in the jvmguard UI. To assign a
VM name, pass the name option to the -javaagent JVM option:
-javaagent:[path to jvmguard.jar]=server=[IP/host],name=[VM name]Each name can only be used by one VM at the same time. If a second VM requests to be monitored with the same name, it takes over and the previously connected VM is disconnected. If you have a pool of VMs that cannot be assigned with unique names, see the section on VM pools below.
In addition to the VM name, you can group VMs into a hierarchy. By default, a VM is inserted into the top-level group.
To assign it to another group, set the group option in the JVM option:
-javaagent:[path to jvmguard.jar]=server=[IP/host],name=[VM name],group=[group name]In the group name, separate hierarchy levels with forward slashes, as in Web/Workers/Gen3. A complete -javaagent
parameter looks like this:
-javaagent:/opt/jvmguard/jvmguard.jar=server=192.198.0.33,name=web,group=Web/Workers/Gen3VM names must be unique within the same group.
VM pools
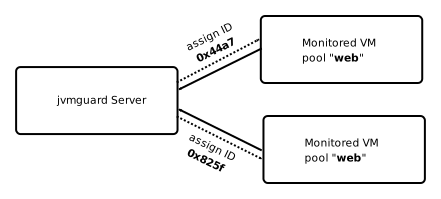
Section titled “VM pools”Sometimes it is not possible to configure VMs with unique names, for example, in a cloud environment where instances are provisioned dynamically. In that case, you can assign the VM to a VM pool:
-javaagent:/opt/jvmguard/jvmguard.jar=server=192.198.0.33,pool=Web/WorkersLike the group option, the pool option takes a hierarchical name with forward slashes as the hierarchy separator. The
pool option cannot be combined with the name option. It can be combined with the group option, in which case the
pool is nested under that group.
In a pool, a monitored VM is given a name with a unique identifier. When the VM detaches, this identifier will never be used again. Unlike for named VMs, the data of a single pool VM is only kept for a shorter period of time, so there is no associated long-term history per instance. However, you can follow the history of the entire pool to analyze trends over time.
Server port
Section titled “Server port”By default, a jvmguard server listens for VM connections on port 8847. This is the port that needs to be opened in firewalls to allow monitored VMs to reach the jvmguard server.
A jvmguard server may be configured to use a different port by setting the
vmPort property in config/application.yaml. This is necessary if the port is already in use or if you
install multiple instances of jvmguard on the same machine.
To tell the agent about such a non-default port, you have to add the port option to the -javaagent JVM option. For
example:
-javaagent:/opt/jvmguard/jvmguard.jar=server=192.198.0.33,port=8912,name=testLogging
Section titled “Logging”The jvmguard agent logs errors to the directory $HOME/.jvmguard/log on Linux/Unix or %USERPROFILE%\.jvmguard\log on
Windows. Log files are created on demand, if nothing is logged, no file is created. The name of the log file is <VM name>.log where <VM name> is the value of the name or the pool parameter. If neither name nor pool is
specified, the file is named jvm.log.
To log to a different file, you can add the logFile=<path to log file> option to the -javaagent JVM option. To
disable logging altogether, the option logEnabled=false can be appended.
Encryption and authentication
Section titled “Encryption and authentication”Mutual authentication and encryption are enabled by the agent keystore file agent.ks in the same directory as the
jvmguard.jar file. The agent keystore is generated by the server and is located in the ssl directory below the
jvmguard data directory.
When the vmUseSsl property in config/application.yaml is set to true, the agent keystore file is automatically added to
the agent files that you download from the jvmguard UI. In that case, encryption and authentication work out of the box.
If you switch encryption and authentication on or off after you have set up your monitored VMs, you have to make the following changes manually:
- Switching encryption on: Locate [jvmguard data directory]/ssl/agent.ks and copy it to the agent installations on all machines where VMs are monitored. The keystore file has to be copied to the same directory as the file jvmguard.jar. If the correct agent keystore is not present, the server will refuse the connection from the agent.
- Switching encryption off: Delete the file agent.ks next to the file jvmguard.jar in the agent installations on all machines where VMs are monitored. If that file is present and the server does not use encryption, the agent will refuse to connect to it.
If you would like to keep the agent keystore file in a different path, add the keyStore option to the -javaagent VM
parameter. For example:
-javaagent:/opt/jvmguard/jvmguard.jar=server=192.198.0.33,keyStore=/sec/agent.ks,name=test